
How to Create a Food Flat Lay for Your Blog Post
Food flat lay photos have come to the forefront of food photography in a big way in recent years. You see them looking delicious all over Instagram and Pinterest. Restaurants and many a food photographer use them to show off their culinary creations.
But what about as a food blogger? Can you create a food flat lay at home and get in on that stunning look that everyone is drawn to? Let’s look at the basics you need to consider.
Choose Your Background to Flatter the Food
The background is a very important starting point for your food flat lay. The right one will create a harmonious picture but the wrong one can be a disaster!
Go for a simple or neutral background, a wood backdrop or even soft pastel colours if you need something with some colour to it. Opt for subtle, simple textures that accent what’s in the photo but don’t grab your attention – that needs to go on the food.

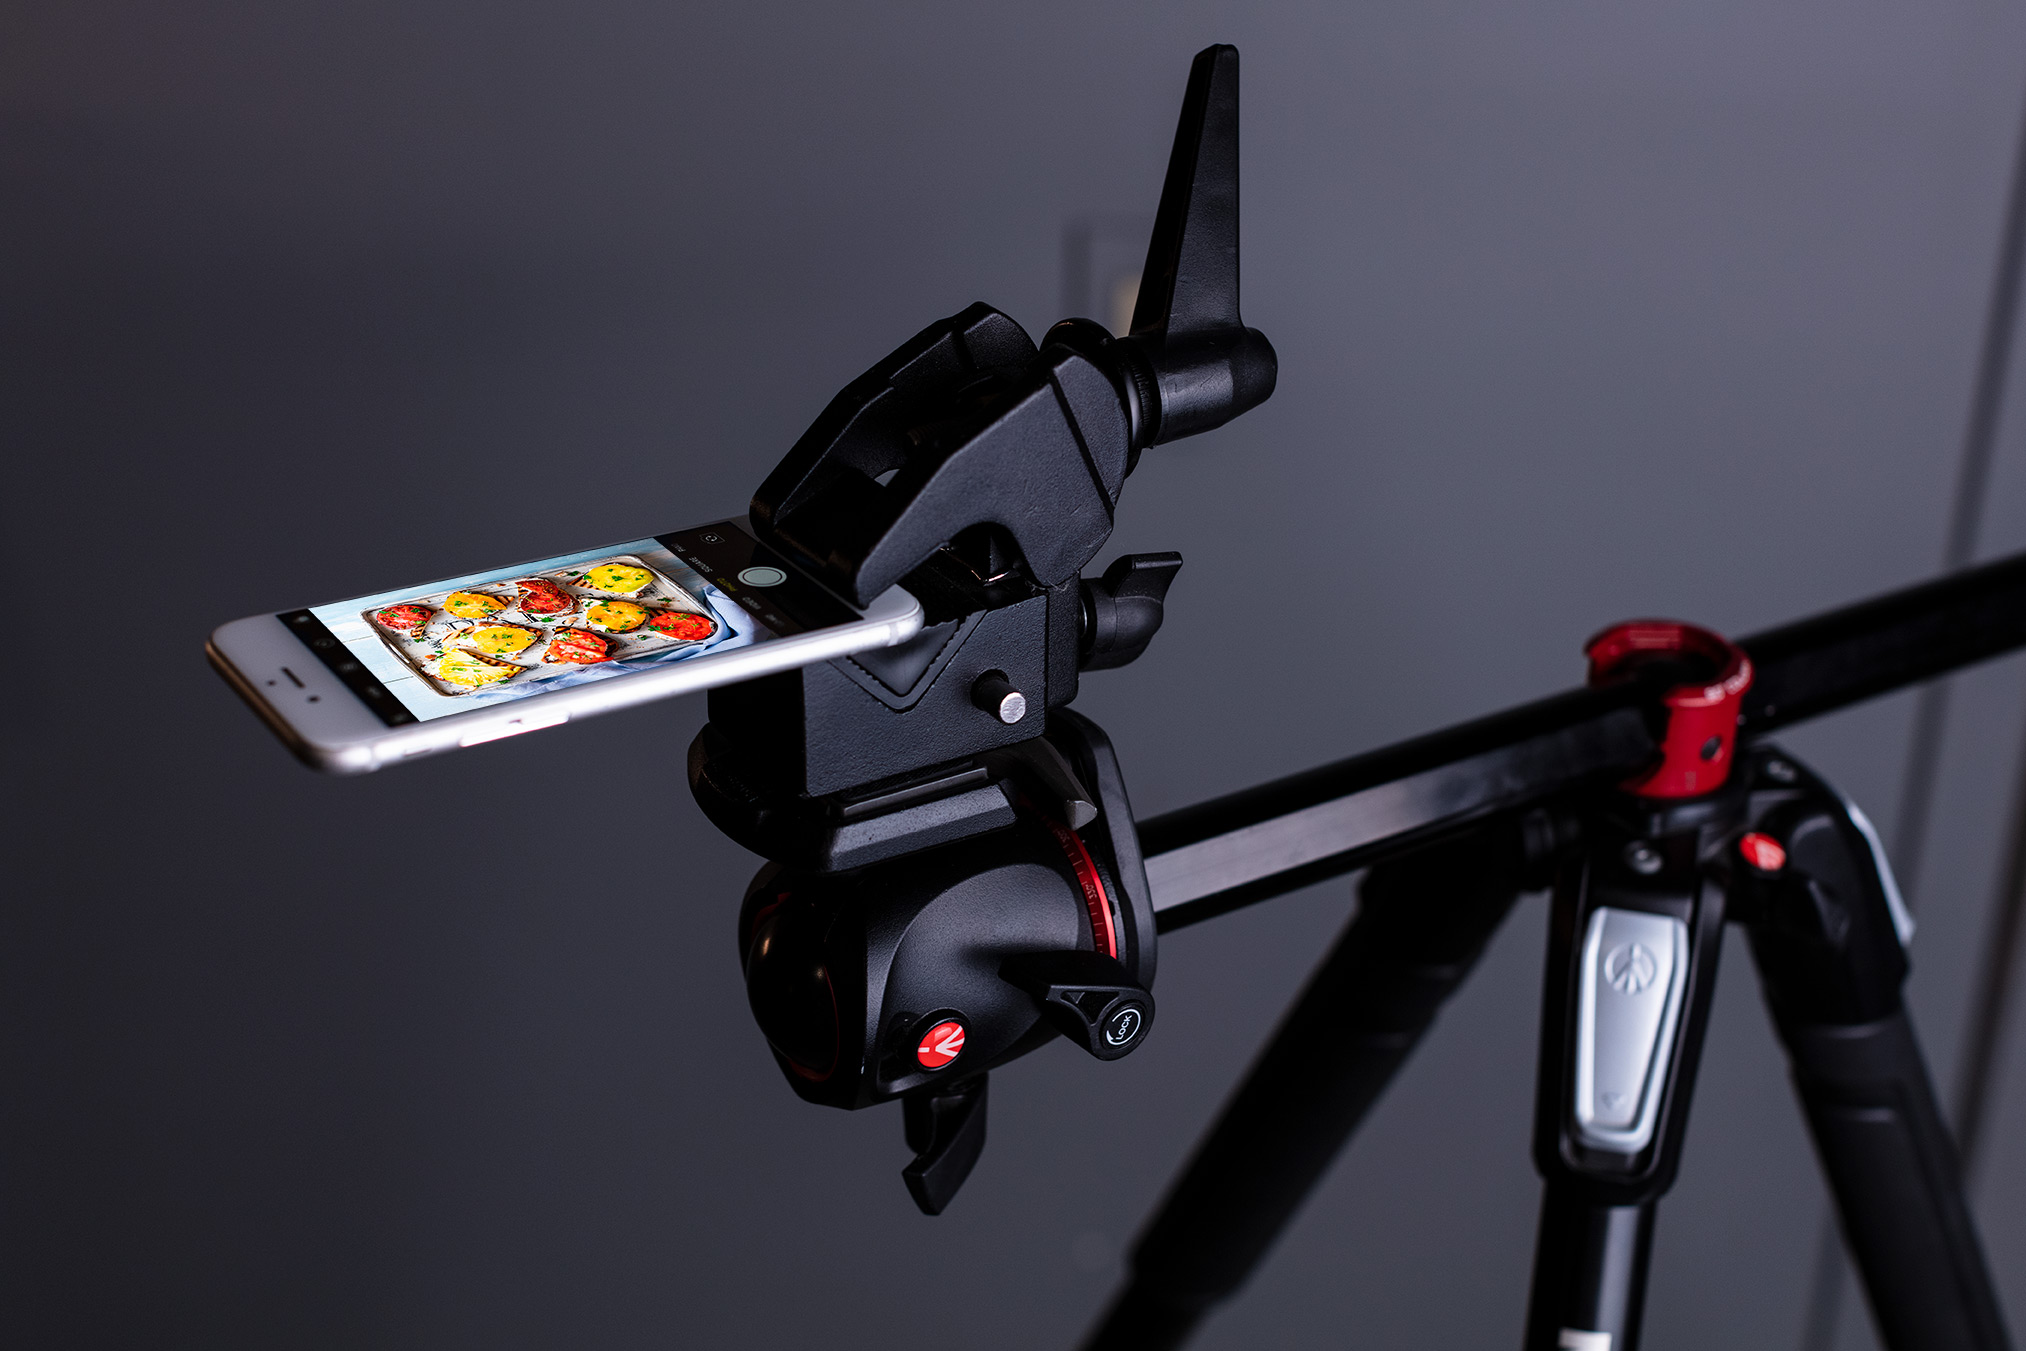
Set Your Camera High and Parallel
Every photo has a different best place to have your camera and with flat lay shots, you want to get high and parallel to the scene. If this is difficult to do, then it is better to set up your shot on the floor so you can get into position.
If you are going to be taking a lot of this type of photo, a tripod with a 90-degree arm will quickly become your friend. And it will save you a lot of back pain and potentially weird standing positions to get your shot!

Manfrotto Befree GT XPRO Aluminium Tripod
with 90 degree column.
Try to shoot tethered where possible then you can see if the shot is working and make real-time changes if it isn’t.

Use Props to Tell a Story
As with any food photo, props are important to help tell the story of the recipe. These can be anything from a few scattered ingredients, kitchen equipment or even something more ornamental. They help with storytelling and creating an atmosphere.
Using props in flat lays is even more important because you aren’t just taking a picture of the focal food item – you are taking a wider shot of the scene around it. So taking a little time to consider what props you need will pay off in a more expressive photo. Pair it with solid food styling for the best results from the larger scene.

Think about things like ingredients in the recipe, items you would serve with it, equipment used to make it or even seasonal decorations like pine cones around a Christmas shot. Look at popular food photography styles and see what kind of props they use to get inspiration for your own flat lay image.
Build Depth Using Layers
While a photo is a 2D item, there’s no reason you can’t make it seem more 3D and therefore more interesting. One of the best ways to do this is to build depth with layers.
And this isn’t as complicated as it sounds – you already made a start when you added props to your shot and thought about the background. The key is to then arrange them in a way to create layers and add that depth.

For example, there’s some salt and pepper flakes that are on a neutral coloured napkin, folded under the plate with the food on top. That’s four different layers that create the effect of depth and make the shot more interesting, just by using the items you were already planning to use in a specific way.
Experiment With the Composition
Now while we love flat lay food photos, there is the harsh truth that not every recipe will work for this type of shot. For example, lots of pizza photography will feature flat lays because pizza looks amazing from above. Pies, cheesecakes, even decorated cakes all work well. Dishes like pasta can be spread out to really show the details.
But something like a hamburger in a bun? A plain un-iced cake? These don’t work so well in flat lays from above so you need to adjust your composition and how you take the shot to get the best from them.
There are a few ways to do it. One is to move your position with the camera to better take the photo. The other is to arrange the food differently so that it works better from the overhead position. Cutting the cake and laying a couple of slices on their side is one example. Tipping the burger so the ingredients fall apart a little and can be seen is another.

Manage the Light and the Shadows
When we talk about food photography lighting, we’ll always say that natural light is best because you get the best colours and the most subtle shadows. With flat lays, those shadows are a big deal because they can either be a stunning touch to the photo or a real pain!
Make use of things like a diffuser to ensure that you have the right balance of light and shadows in your shot.

Include Humans in Your Flat Lay Food Shots
It never hurts to include some human element in your photos but that doesn’t mean you need to have whole people in them.
Something as simple as a hand reaching for an item of food or holding a cup or utensil can make the shot more relatable. Or you can show people without having their faces in the shot.

Be Creative With the Frame
Once you have your photos, don’t forget the most important step in the process – editing them. This is where you can get creative with the frame and really hone in on what needs to be in the shot and what doesn’t.
Try cropping the photo in different ways to highlight different features, elements of the shot or even props. Look at the light and how the shadows work and use the editing tools to make them just as you want them.

Taking great food flat lays
Food flat lays do take a little more work than some styles of food photos but they are well worth it for the impact they create. So mastering the basics and developing your own style for them is going to have a big benefit for your food blog and especially for social media marketing.


