
How to Use Exposure Compensation: Everything You Need To Know
Have you ever wondered what exposure compensation is? Here’s everything you need to know about exposure bracketing and how to use it. Exposure compensation, also known as exposure bracketing, is a technique that allows photographers to alter the amount of light their camera takes in by changing the shutter speed or aperture. This adjustment can be made manually on some cameras or automatically through your camera’s metering system. When should you use exposure compensation? How do you make adjustments? Read on for all these answers and more!
What is Exposure Compensation?
Exposure compensation is the act of changing your camera’s exposure values manually, to tell your camera whether the scene needs to be brighter or darker.
When you take a picture with your camera, it usually determines the exposure by measuring the light in dark and bright areas of the scene. You can see what the camera is seeing by looking at your histogram. The camera’s of what the exposure should be is often not enough though; an image can come out too dark even if there was plenty of natural lighting or too bright when taking pictures inside without any windows. That’s where exposure compensation comes into play. It will either make the image lighter or darker depending on how much compensation you choose.
Most camera’s work in increments of EV (exposure value) stops, which are numbered from -/+0. Each of these increments change the lighting by a factor of two.
When should you use Exposure Compensation?
Exposure compensation is a powerful tool that you can use to take control of the exposure in your pictures and show us something stunning. This isn’t just for tricky lighting like high key/low key or scenes with both dark areas and bright spots (high dynamic range) – it’s also great when shooting landscapes, sporting events, portraits, pretty much anything!
So when should you adjust exposure compensation? Check out the examples below:

By darkening the landscape sunset or sunrise scene you enrich the colours and create a moody atmosphere.

Shoot a white scene (such as a snow-covered landscape) and the camera will tend to under-expose the whole scene. This happens because the meter generally assumes that there is a full range of tones within a scene, so creates an exposure that will turn snow into an ugly greyish midtone.

The dark and moody food photography style, also called chiaroscuro uses it in combination with spot metering.

Alternative, you might want a high key image. That’s where adding brightness to your image and allowing the background to clip with work.
How to Use Exposure Compensation?
You can find exposure compensation in your camera’s menu, on top of its shooting mode dial (if you have one), and as a button near the shutter release. To adjust it, simply enter your desired value in EV increments using the +/- keys and press OK.
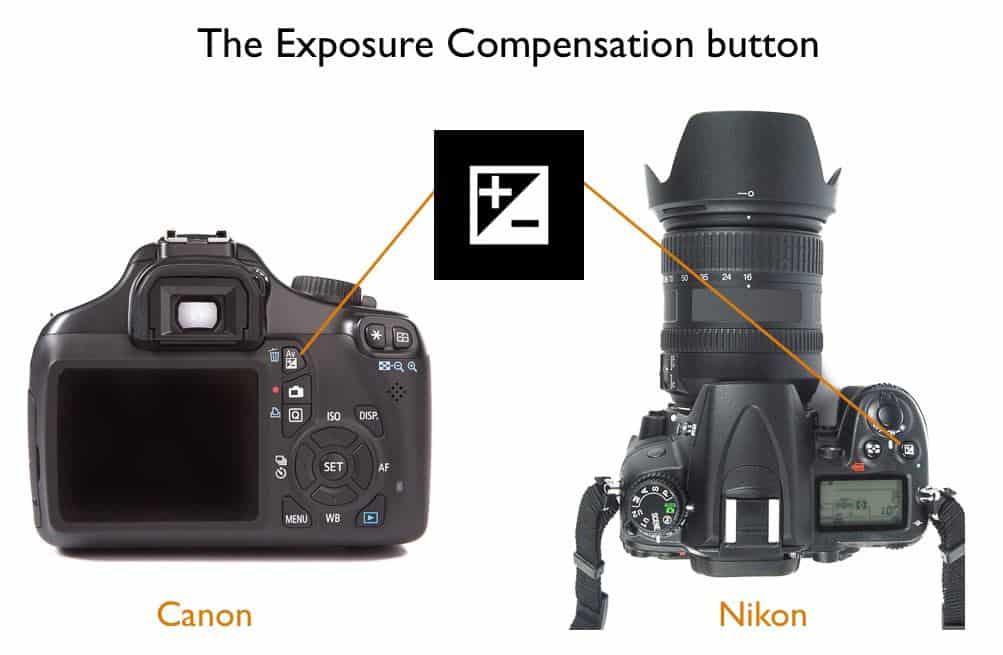
How to adjust exposure compensation on Canon:
Exposure compensation is usually measured in exposure values (EVs). An increment of one EV doubles or halves the amount of light reaching your sensor.
How to adjust exposure compensation on Nikon:
Nikon exposure compensation is slightly different to canon because while it is still measured in exposure values (EVs) Nikon uses decimals instead of canon’s simplified dot system.
A value of +.33 EV means that the camera will be fooled and shoot one third more light to create a brighter photo, whereas -.33 EV would mean less light, making an image darker.

How exposure compensation works?
For those of you who like to know how it works. Exposure compensation works by changing the exposure values. Depending on which camera mode you are using, your camera will adjust according.
Exposure compensation with aperture priority mode
When you increase your exposure compensation by one EV in aperture priority mode, it will make an automatic change in shutter speed of twice as much (e.g., going from a shutter speed of 125th/sec to 250th/sec). Conversely, decreasing your exposure compensation by one EV would automatically adjust your camera the other way.
Exposure compensation with shutter speed priority mode
When you increase your exposure compensation by one EV in shutter priority mode, it will make an automatic change to your aperture and finally if using in manual mode it will adjust your ISO.
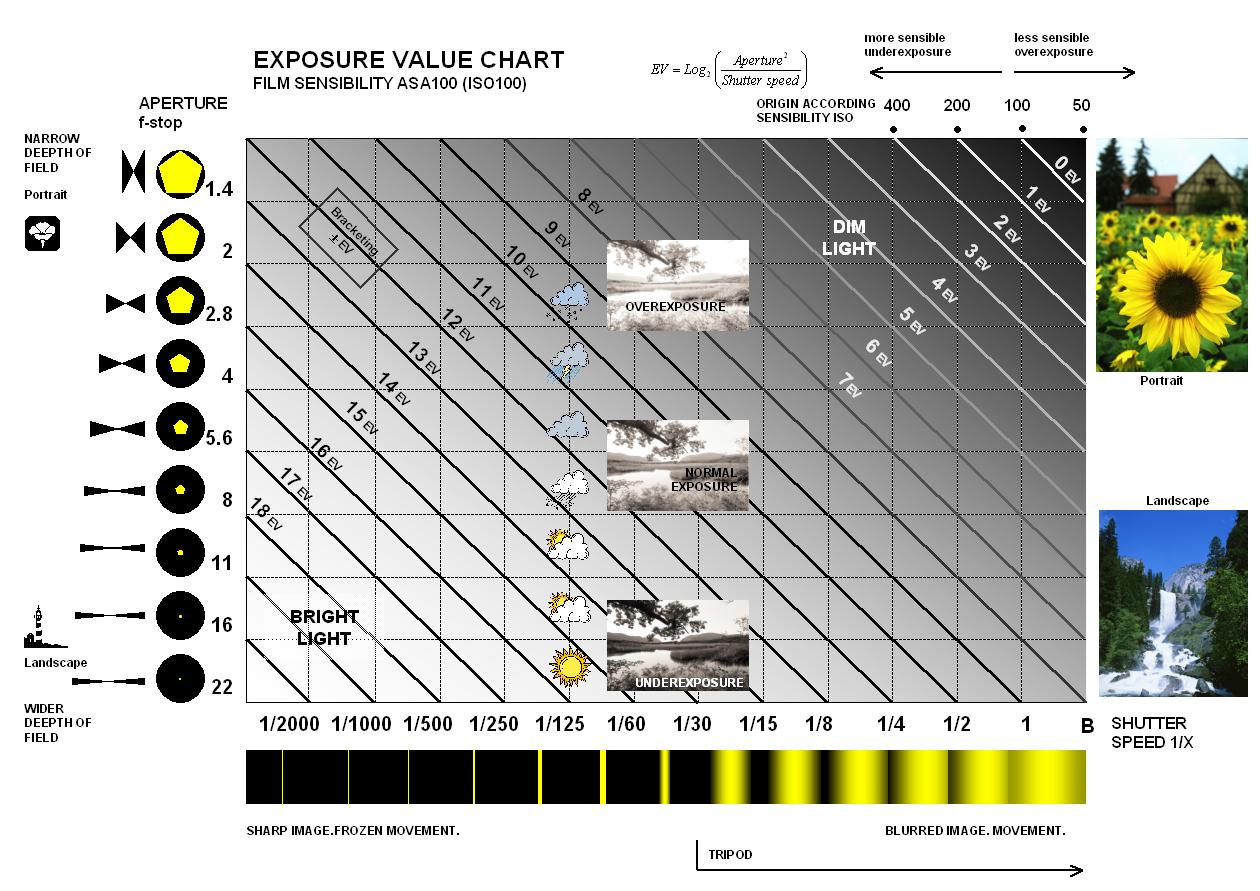
To see the full breakdown, check out the Exposure Value Chart below to find out how exposure compensation is calculated:
Exposure Bracketing
Exposure bracketing is a technique where your camera takes a series of photos with different exposures and you put the best one where it needs to be. Exposure bracketing is useful when shooting in low-light conditions or for motion shots because sometimes what looks clear on the viewfinder might not turn out as expected, so exposure bracketing can save you from this hassle.

Clearly, the picture on the left is underexposed, the middle is a normal exposure, and the right is slightly over exposed. You can also stack the exposure compensations to create a HDR photo in post processing by merging the layers.
Exposure Compensation with Advanced Metering Systems
You can use exposure compensation with your metering modes. It’s highly effective with spot metering because it will ensure the spot is exposed properly.
With matrix metering, you can use exposure compensation to get a more accurate reading of your scene and it’s effective with outside scenes where there are lots of different objects in front of each other which would make it difficult for the camera to take an appropriate exposure.
Number One Tip for Using Exposure Compensation: Always shoot in RAW!
Having all that extra data, allows you more room to edit after.
Exposure compensation is a powerful camera setting that can be used by beginners and professionals to ensure they find the best exposure for the scene. This article has covered some of the basics, but if you want more information on how it works in different situations or are looking for ways to use this technique creatively then check out these creative lighting techniques.


