
What is Macro Food Photography?
Have you ever noticed how macro food photography can make an appetizing dish look even better? The macro lens captures the details of what is in the foreground while blurring out any imperfections or distractions in the background. It’s a great way to show off your dishes and entice people to come try them!
In this blog post, we’ll cover everything from macro lenses, composition ideas to some best practices for getting awesome macro food photos.
Why macro lenses are great for food photography
Even if you don’t realise it, you’ve probably seen tons of macro food photos because all of the top food bloggers and photographers use them. But what makes them so great for food photography?
The key is understanding what a macro lens is. Macro lenses are used to take photos that focus just on the macro area (things close-up). This means they’ll capture details like a drop of sauce or an egg yolk.

If you like a bit of technical stuff, a magnification ratio of 1:1 means that the subject size on the sensor plane is the same or bigger than in real life. Anything with a 1:1 ratio or even 2:1 or 3:1 will be a macro lens. But if it is something like 1:2, 1:3 or 1:4, it isn’t a macro lens./
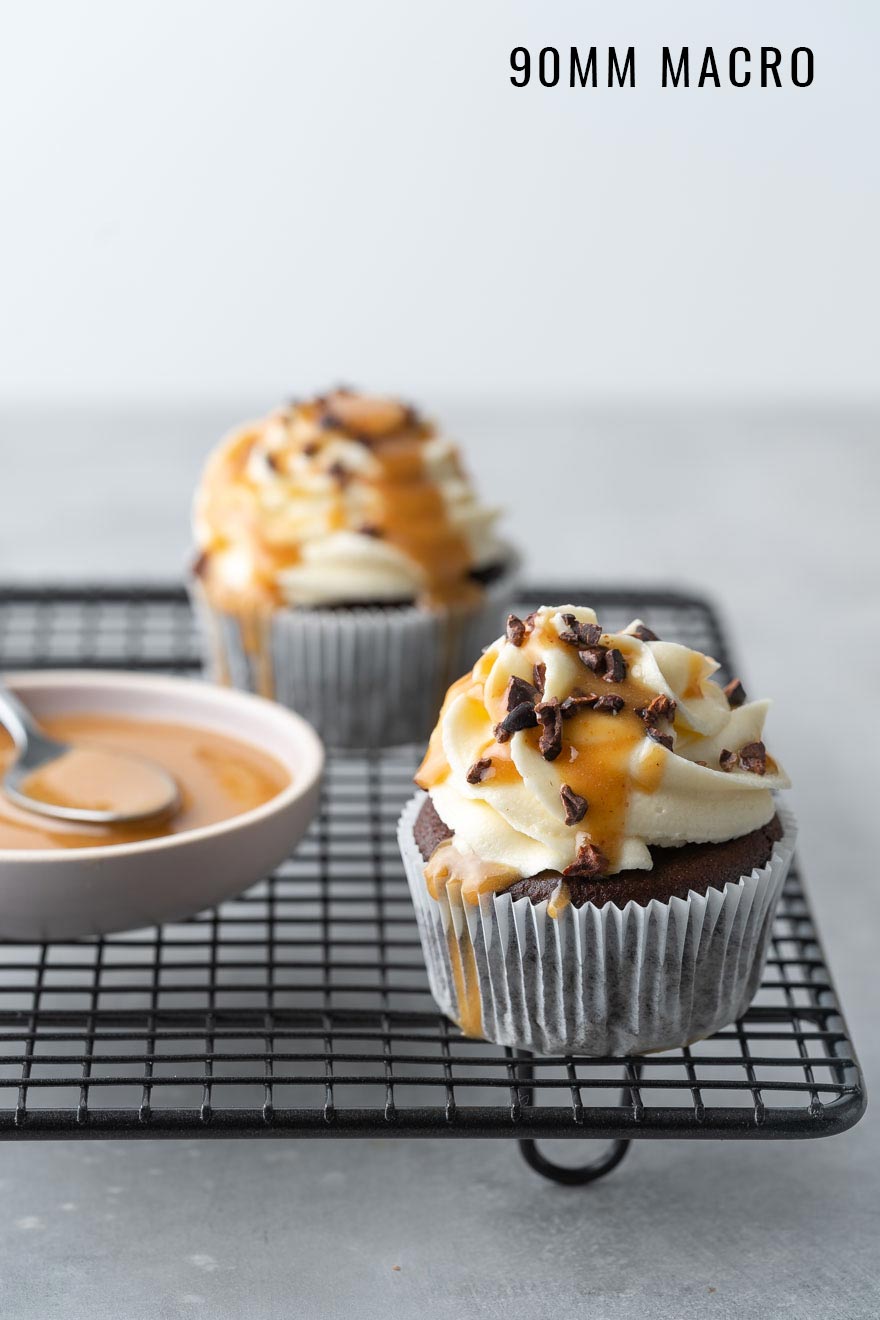
A macro lens will also work well for food photography because it has such a narrow focal length, which is perfect for getting in tight and capturing all those beautiful details. The macro lens is also great for food photography because it allows you to easily blur the background, making the plate stand out.
Macro versus magnification
The other thing to understand is that a macro lens is about more than just magnification. If you get a lens that simply makes everything bigger, this isn’t a macro lens.
That’s because a macro lens also works for other types of shots, not just the close-up ones. You can use it to take photos of things much further away and still get a great photo. But a magnification lens won’t be able to do anything but make close up stuff larger.
Best type of macro lens for food photography
Every photographer has their own opinion but for me, there’s only one thing to think about when it comes to macros lenses – the 100mm macro lens.
Now I’ll admit, the 100mm macro lens isn’t the cheapest lens you are going to buy. But the versatility and quality of the photos you’ll take will be well worth the investment. It will allow you to get those close up shots, amazing detail and also things like those 45-degree shots that everyone loves.
It has a better minimum focusing distance and also a lot of great maximum aperture options as well.

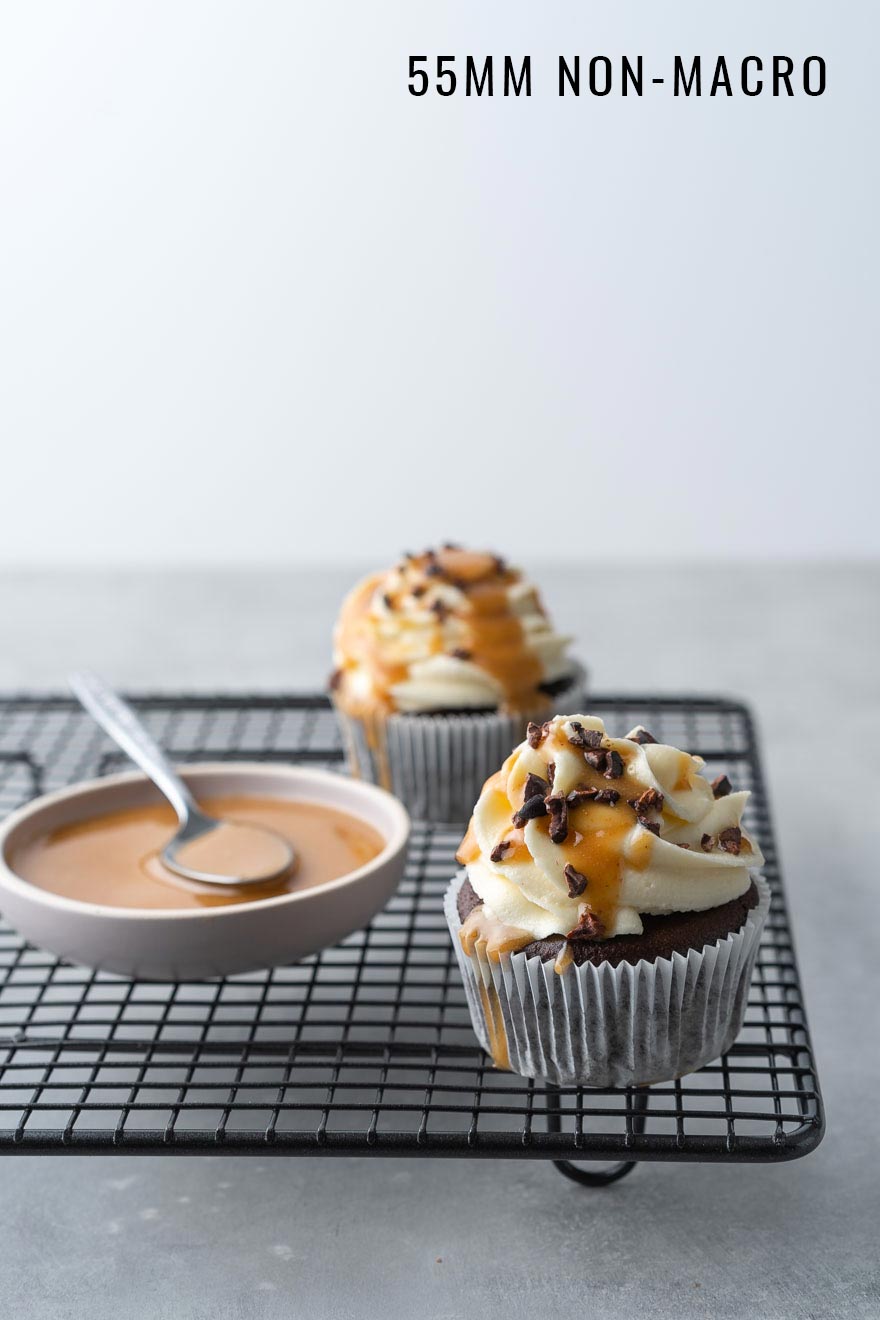
Some photographers do recommend the 60mm macro and it is a good lens. But you won’t get those 45-degree angle shots or the really gorgeous shallow backgrounds that you will with the 100mm.
And if you already have a 50mm lens, there’s not a huge amount of difference. So save up your money and go for the 100mm instead!
Macro food photography basics
Now we understand why we need to learn macro photography for food and picked the best lens, let’s look at a few of the basics as they relate to food photographers taking photos of food and drink.
Focal Length and Minimum Focus Distance
I’ve already mentioned the focus distance with the lens discussion but it is worth mentioning again. If you have a full-frame camera, the focal length of the lens will be as stated on the specifications from the manufacturer. If you have a cropped sensor, this can change things a bit and will need extra research.
The minimum focus distance of the lens tells you how close you can get to the subject to have it focus. As an example, the Canon 100mm f/2 has a minimum focus distance of 31cm or just over 1 inch. So the camera needs to be at least that distance from the item to focus properly.

The Plane of Focus
The plane of focus is an imaginary plane in two dimensions that always remains relative to your sensor. Anything within the plane will be in focus and areas outside with being less focused or in the depth-of-field (see below for that).
Changing the angle of the camera or its position means the plane of focus stays relative to the sensor. How much is out of focus depends on the aperture and also their relative distance. Ideally, most of the food you are photographing would be on the same plane of focus. If not focus stacking comes in (also covered below).
Depth-of-Field
Depth of field (DOF) is the distance between the nearest and farthest objects in sharp focus. This is decided by the focal length of the lens you are using, the distance from the subject and the aperture you are using.

The shorter the distance, the ‘thinner’ the depth of field will be. But many food photographers make the mistake of using too small a depth of field when taking photos of their dishes. This means only a small area of the subject is focused and the rest is blurry.
The trick can be to shoot food with a macro lens at a setting such as f/5-6 but move this upwards if you need to get more of the subject into focus.
Manual Focus
Autofocus can be great for some things but you want to get very accurate with macro food photos and that means using manual focus. Plus macro lenses don’t tend to have the best autofocus abilities so take matters into your own hands.
Take control of the focus and ensure you are getting the perfect positioning so your shot has just the right focal point.
Focus Stacking
Finally, there’s focus stacking. This helps to combat the issue of getting closer to an image but also ending up with a shallow depth of field. So if you take a shot of a piece of orange, only a tiny part will be in focus if it isn’t flat and that may not be what you want.
The solution is called focus stacking. Here you take photos with different focus points, covering all the main parts of the subject. Then you combine the images in Photoshop or other software like it so that the final image has multiple points of focus.
Composition ideas
Once you understand a few of the basics of using a macro lens for food photography, then you can start thinking about your composition. Here are a few basic ideas to help get you started.
The Portrait
Food can create a type of portrait too when you take advantage of larger structures, groups of food items or a whole plate. Also, think about things like reflections and the surfaces the food stands on and how these can add to the photo. You can turn even the most basic, almost boring, ingredient into something more interesting if it is part of a clever photo.

The Close Up
This type of photo is obvious with food – get that lens working to its full potential and get as close to the food item as possible. This doesn’t mean you just fill the screen with the texture of it (although you totally can do this) but that you allow a single ingredient or part of a dish to be extremely detailed.

Open or Slice Them Up


With some food items, the outside can be a little boring but if you open them up, there’s more going on. Consider opening food out, slicing it, cutting away portions and anything that allows for a more variety shot. Think about something like cabbage – a bit plain on the outside but if you cut it through, you can see all the markings inside – much more interesting!
Tips for the best macro food photos
Finally, there are some simple tips to help you get the best shots with a macro lens, many of which work with food and other types of shots.
Use A Tripod For Macro Food Photography
For many shots, using a tripod can be a smart option because it allows you to reduce the camera shake but also to get that perfect focus. Plus it makes it easier to set up the camera, make adjustments to the food and then just make small adjustments to the camera position to accommodate this.
Don’t Always Rely on Autofocus
Remember, macro lenses don’t have the best autofocus ability to sometimes focus on the wrong thing. So this is where manual focus comes in, where you use something like LiveView or just a manual setting on your camera to get the right focal point.
Know When To Use VR in Macro Food Photography
No, VR isn’t virtual reality, in this case, it refers to vibration reduction. This is something that some lenses will have and it can be a useful one, especially if you can’t use a tripod. VR works to stabilise the image and reduce the natural movement that comes when we hold the camera. If you aren’t using a tripod and have VR, then it is worth using.
Take the guesswork out of natural light
Natural light is the best for any type of photo but sometimes it can be a little unreliable. That’s where using something like a reflector or macro light can help. This ensures you get the shot you want with natural light but also enhances it so that you remove a little of the random light quality.
Shoot With A Fast Shutter Speed
Shooting with a fast shutter speed is one of those interesting things because it sounds like common sense but if you are in a low light situation, it can be trickier. The exposure triangle will tell you that a slower shutter speed is needed. But experiment with it because you might find that sometimes, rules are made to be broken, like macro action shot photography.
Don’t forget the importance of editing
Macro food photos can be stunning but like almost any type of photo, you still need to do your editing afterwards. Even the best photo with stunning light and no obvious problems will benefit from a touch up in Lightroom. So as part of your photoshoot process, always allow time for this and you will get the best possible sharp photos for your blog.
What are some of your favourite macro food shots? I’d love to see them.


