
Simple 5 step guide to food photography for beginners
Taking a great food photo easily comes down to 5 simple steps! Use this food photography for beginners guide to create flawless food photos.
If you’re fed up of mediocre photos and wish someone would just tell you exactly how to do this.
How to get started taking food photos
One of the reasons that people THINK they can’t take great food photos is because they don’t have an expensive, fancy food photography equipment. And yes, the right equipment can make a huge difference but there’s nothing stopping you taking great photos with the camera on your phone.
Smartphone cameras are awesome
If you look at a comparison of the camera on the iPhone 8, the Samsung S8 and a camera such as the Canon 5D Mark 1, you will quickly realise that those phone cameras are pretty impressive. They have a similar number of megapixels, similar image resolution and can take amazing video. (If you want to learn more about this, check out my post) But what about making the most of your smartphone? There are two options – you can either buy special lenses for your smartphone or use an app to fully utilise the native camera. The aim is to go for a wide angle to be able to get all of the food into shot. Yes, you should be shooting in DNG (Raw for smartphones)
DSLR cameras
If you have a DSLR or are ready to start with one, then the best lens for food photography is the 100mm macro lens. Macro lenses are designed to get a hugely detailed shot of a small area while making the rest of the world blur out beautifully. They have moderately wide apertures and moderately long focal lenses. The 100mm macro is the most popular, although you can get 150mm, 180mm and more.The macro lens is ideal for the two classic food photography shots (more on them in a minute) – the 45 degree and the straight above shot. It allows you to pick up all of those amazing food details without the background coming along and causing confusion.

Choosing a feeling & style
Knowing what you want to capture and how you want to capture it, pretty much helps determine exactly what you’ll need to get there.
Food photography composition comes down to four questions:
Where do you put the main subject (in this case, the food)?
What feeling /story are you trying to capture?
What do you want to include in the shot?
What do you not want to include in the shot?
Mention composition rules and people start to get nervous – it is like being back in school, with algebra and all that stuff! But the truth is that photography rules of composition are more like guidelines, inspiration or a way to understand how great food photos work.
There’s no doubt that some of the key rules of composition and different food photography lighting play a big part in food photography and creating that feeling you want and shouldn’t be overlooked or mixed up. The biggest mistake I see beginners make is not thinking about how the composition and lighting impact the feeling of the photo.
Who doesn’t love brownies?
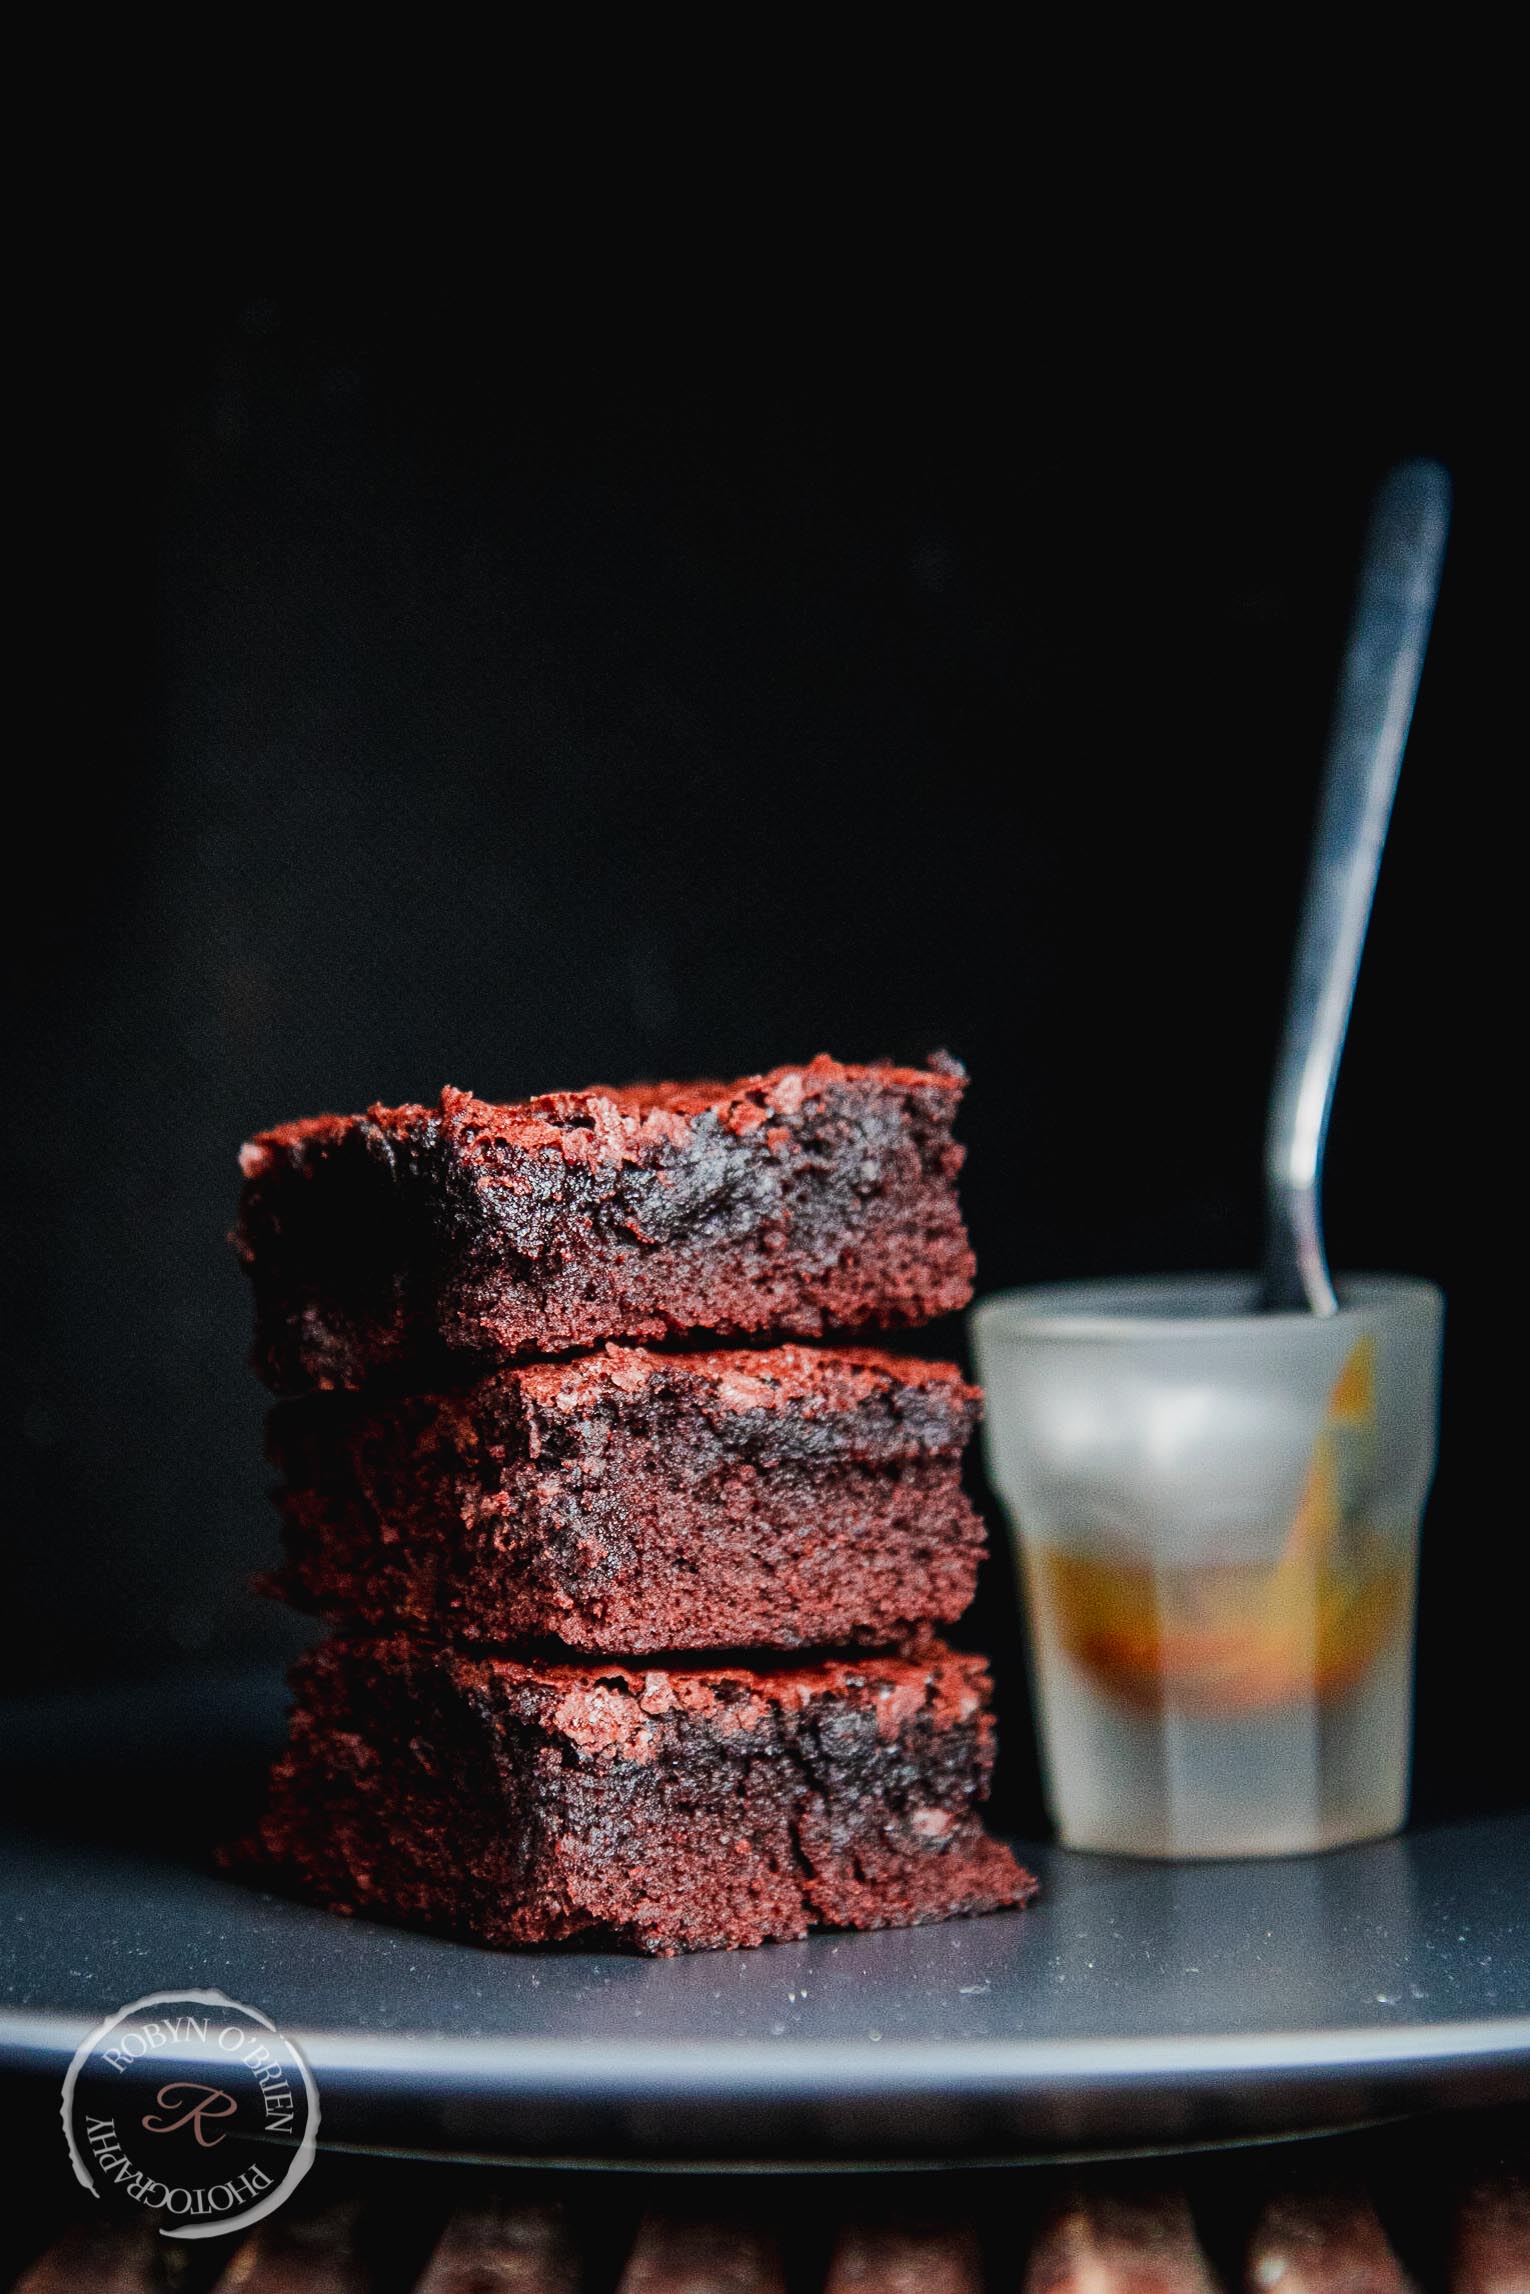
When I think about brownies, I remember the idea of warm, delicious and decadent cake. I want my photos to depict that self-indulgence luxury that you can enjoy alone quietly after the kids have gone bed.
I love planning out my shot before putting in lots of effort. It’s a quick exercise that allows me to see all the different possibilities, and then I trust my gut to know which are worth trying to convey the story.

Having worked out that I wanted to create a feeling of: decadence, luxury, rich & sweet. I knew I wanted the colours to reflect this, so choose to concentrate on darker colours. Black, brown and grey.
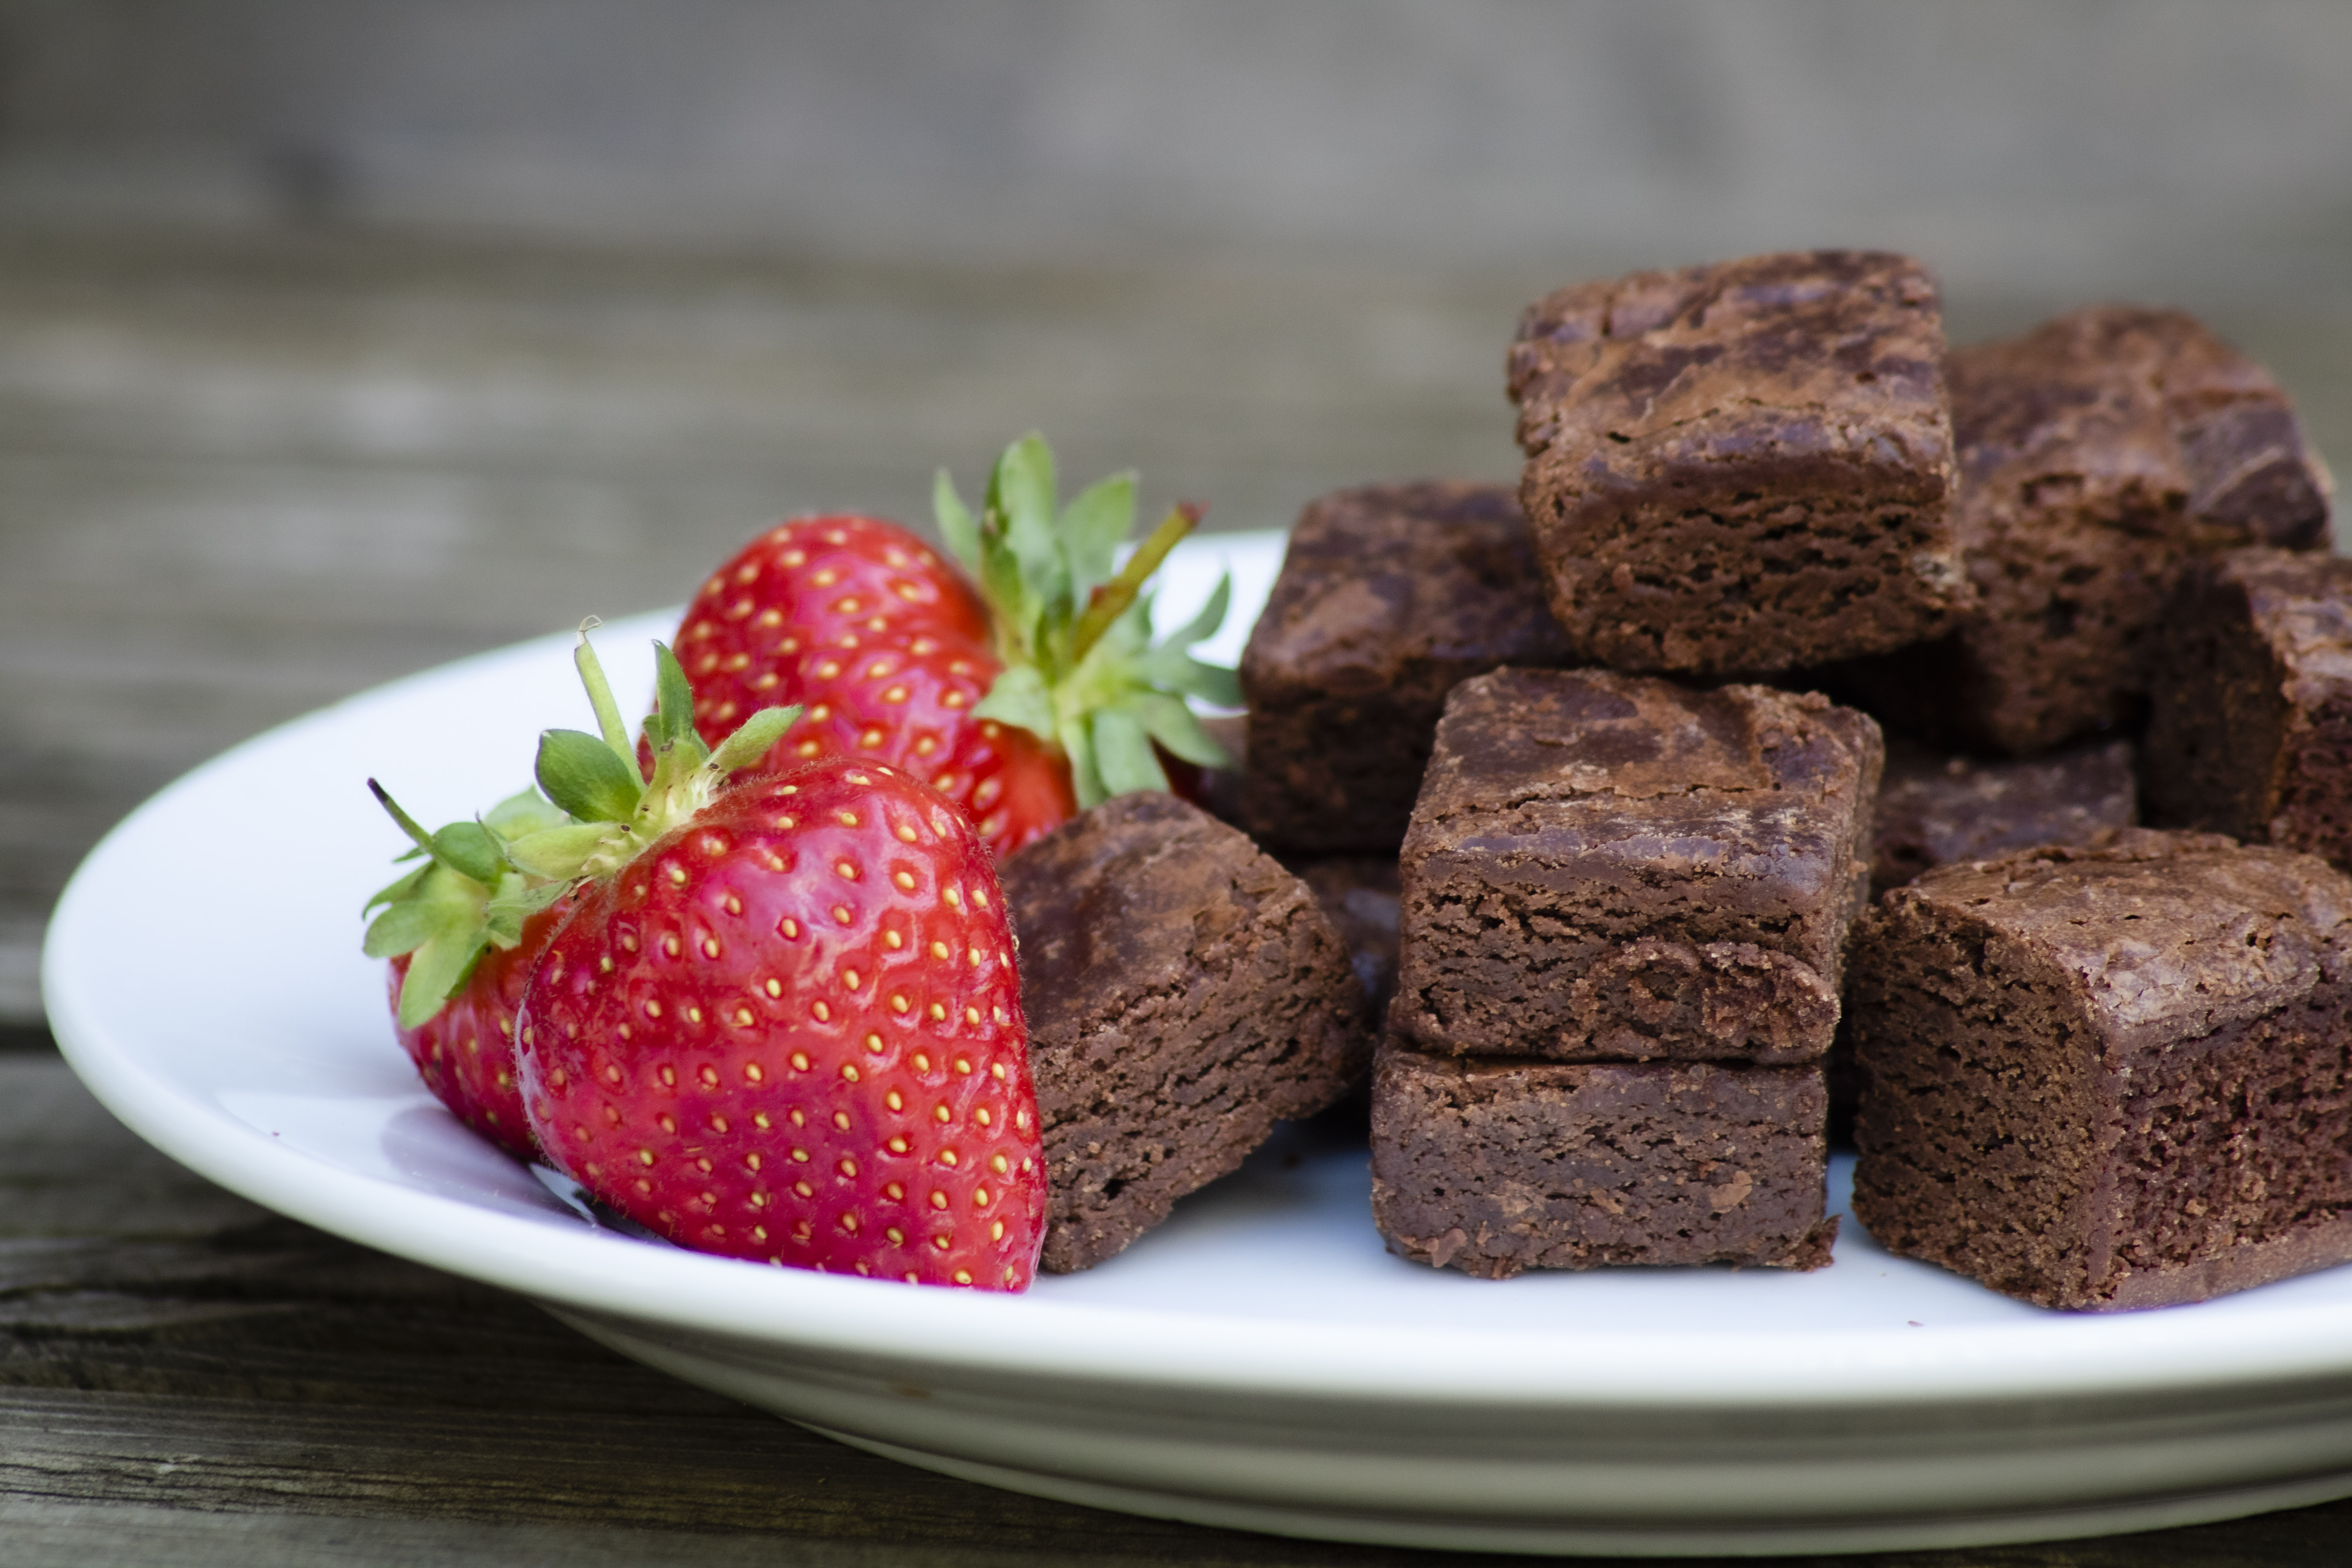
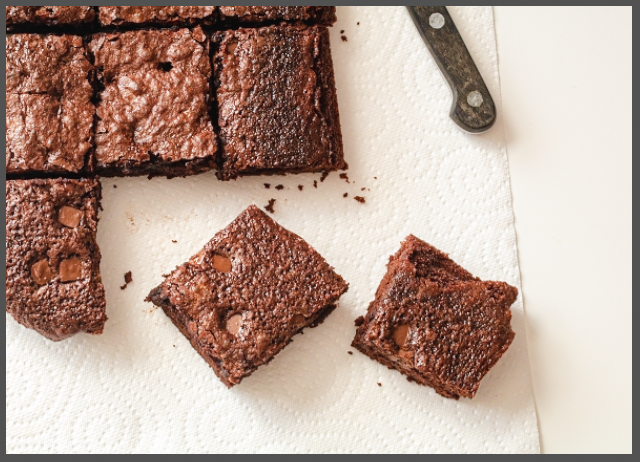
It was now about seeing which combinations showed it best. I tried three different compositions just to see.
Which do you feel meets that decadent feeling?
Food Styling – Props and Backgrounds
Food styling is the art of meticulously arranging and presenting food in a visually enticing and appetizing manner, capturing the essence of its flavors and textures.
As you can see, backgrounds back a big difference. Don’t forget while their are many stunning food photography background that you can buy, there’s also many already in your kitchen.
Top 5 food backgrounds (that you already have):
- Baking sheets
- Chopping boards
- Tiles
- Fabric
- White foam boards
- Don’t be afraid to use anything that feels right, like wood, paper or even food.There is no right background.
My favourite pro food backdrops
When it comes to finding props, don’t think you have to invest in ultra-expensive stuff to get the right photos. One of my favourite tips for students is to go to the nearest flooring tile shop and buy an odd tile. This will make a great base for the photo and is far less expensive than buying a box of tiles.Use what you have around you, pop to the local charity shop or check out the pound shops. You can get all kinds of inexpensive props that will work well in your food photos without costing a fortune.
Top five food props:
- Family – Don’t under estimate the human touch.
- Food foliage – from garnish to ingredients.
- Hands
- Ingredients
- Utensils
Deciding your angle / perspective
Think about your favourite food photos – I bet they are one of two angles. The two most popular angles for food photos as well as for flat lays is either straight above the elements or at a 45 degree angle. Shots from straight above are ideal to get all of the details of the food. Dishes like noodles, pasta, soup and others that are in a dish or on a plate can look amazing from above because you can see all the ingredients. Pizzas or pies also work well straight above. Other dishes such as burgers or sandwiches look better from a 90 – 45 degree angle because you can see the layers in the dish – straight above just shows you the bread!
Camera settings
Learning what your camera is capable, enables you to fill your toolbox with endless possibilities, whether you want to show off your ingredients, your process, action shots, or simply feel confident knowing which buttons do want and will show the best side of your food. (7 Camera setting every beginner needs to know- video)
Editing
This is the step that is normally either overlooked or overdone. Editing your RAW photos is essential and show enhance what you managed to achieve in camera, BUT should be subtle. I have a simple process for editing that takes just 7 steps but ensures you get the results you want in as little as 3 mins. If you want to know more about it, you can find out here.

My top 5 food photography tips just for you
Equipment, composition and lighting are the three core elements that you need to learn to take great food photos. Once you have those food photography basics in place, you are ready to start learning your own style, showing off what you love best and how to take photos consistently. So here are a few of my top tips to help you develop your camera skills.
Have a consistent style and set up
It is tempting to bounce around, try lots of different things and experiment with every type of food photography backdrops you can find. By working out what type of your photo you want to create you can work on creating consistent approaches and processes that help you stay consistent and save time in the process.
Repeat elements in your composition
Sometimes you want to do more than just photograph a plate, some cutlery and a few little herbs scattered around. One tip to make this easy to do is to repeat elements. So you have cooked a meal for two? Then feature two plates or bowls. Maybe it is a cookie recipe – then use a stack of five cookies rather than just the one. Repeating elements can create a brilliant food photo.
Consider garnish
Those herbs scattered around are important! Garnish of any kind adds extra features to the shot and should complement the central pieces of the composition. It also makes the picture more interesting and can bring in touches of other colours. Consider using ingredients from the recipe where possible.
You can shoot dark and moody food photos
Go onto Pinterest and many of the photos you see will be light, bright and white. That’s great and these are the most common types of food photos to take. But you don’t have to limit yourself – you can go dark and moody sometimes. The key is to have dark props, surfaces and backgrounds and ensure the food itself is the most colourful thing in the shot.
Use negative space
Negative space, also known as white space (even when it isn’t white) is the area where nothing is happening. And it is an important part of a good photo. Don’t think you have to fill the shot every time, step back a bit, have some of the surface showing with no elements on it and give the focal elements some space.


