
How to create a Photobook in Mixbook [Tutorial]?
Quick Mixbook tips for creating a photo book
- Check your photo quality – Poor quality photos will look like poor print but it’s not
- Organise ALL your photos before you even think about starting
- Preview your book before hand, the last thing

How to use Mixbook to create a photobook?
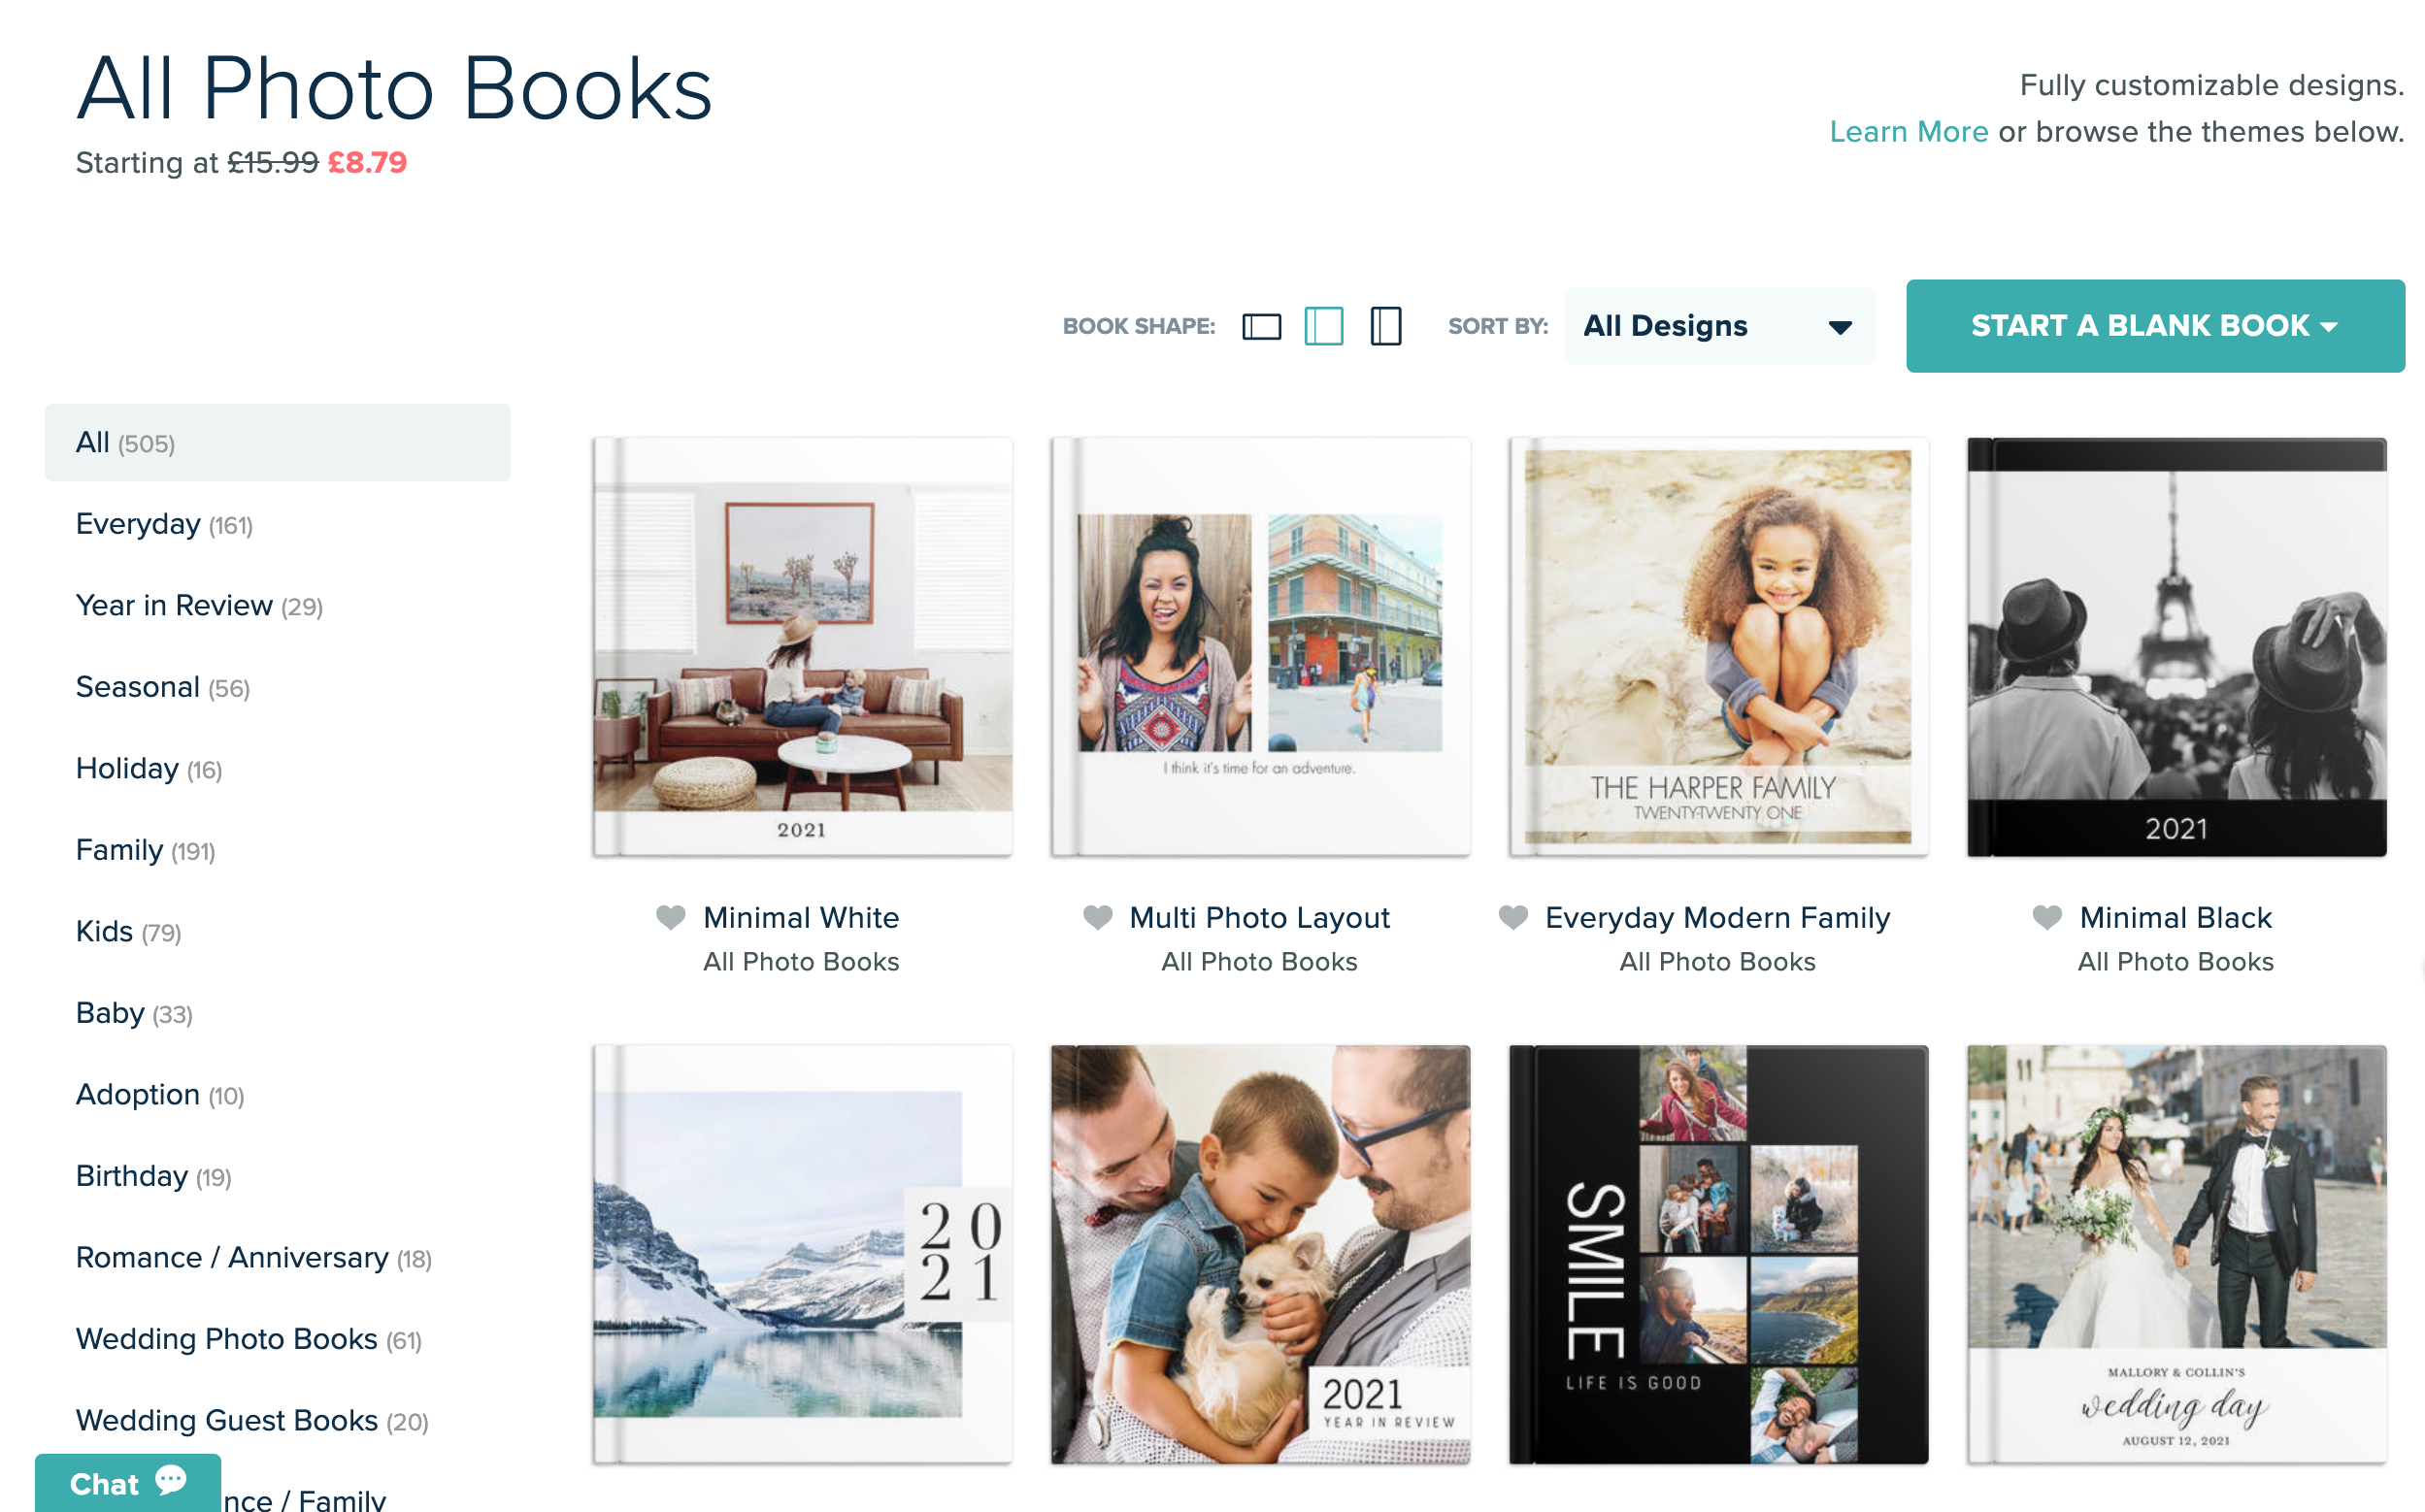
Step 1 – Choose your book cover
Mixbook shows you over 500 done for you design templates to get you started. You can even choose designed from celebrities like Martha Stewart and other professional designers. However that being said. It’s depends on where you are on which types of photo book covers are available to you. Most countries have the following:
- Coffee table softcover book style (My personal favourite)
- Hard Cover Books
- Matt Cover Lay flat books
- Mixbook leather cover book (only available in the US)

Now that you’ve decided on the type of photo book you want. You’ll need to be a size.
What size mixbook to get?
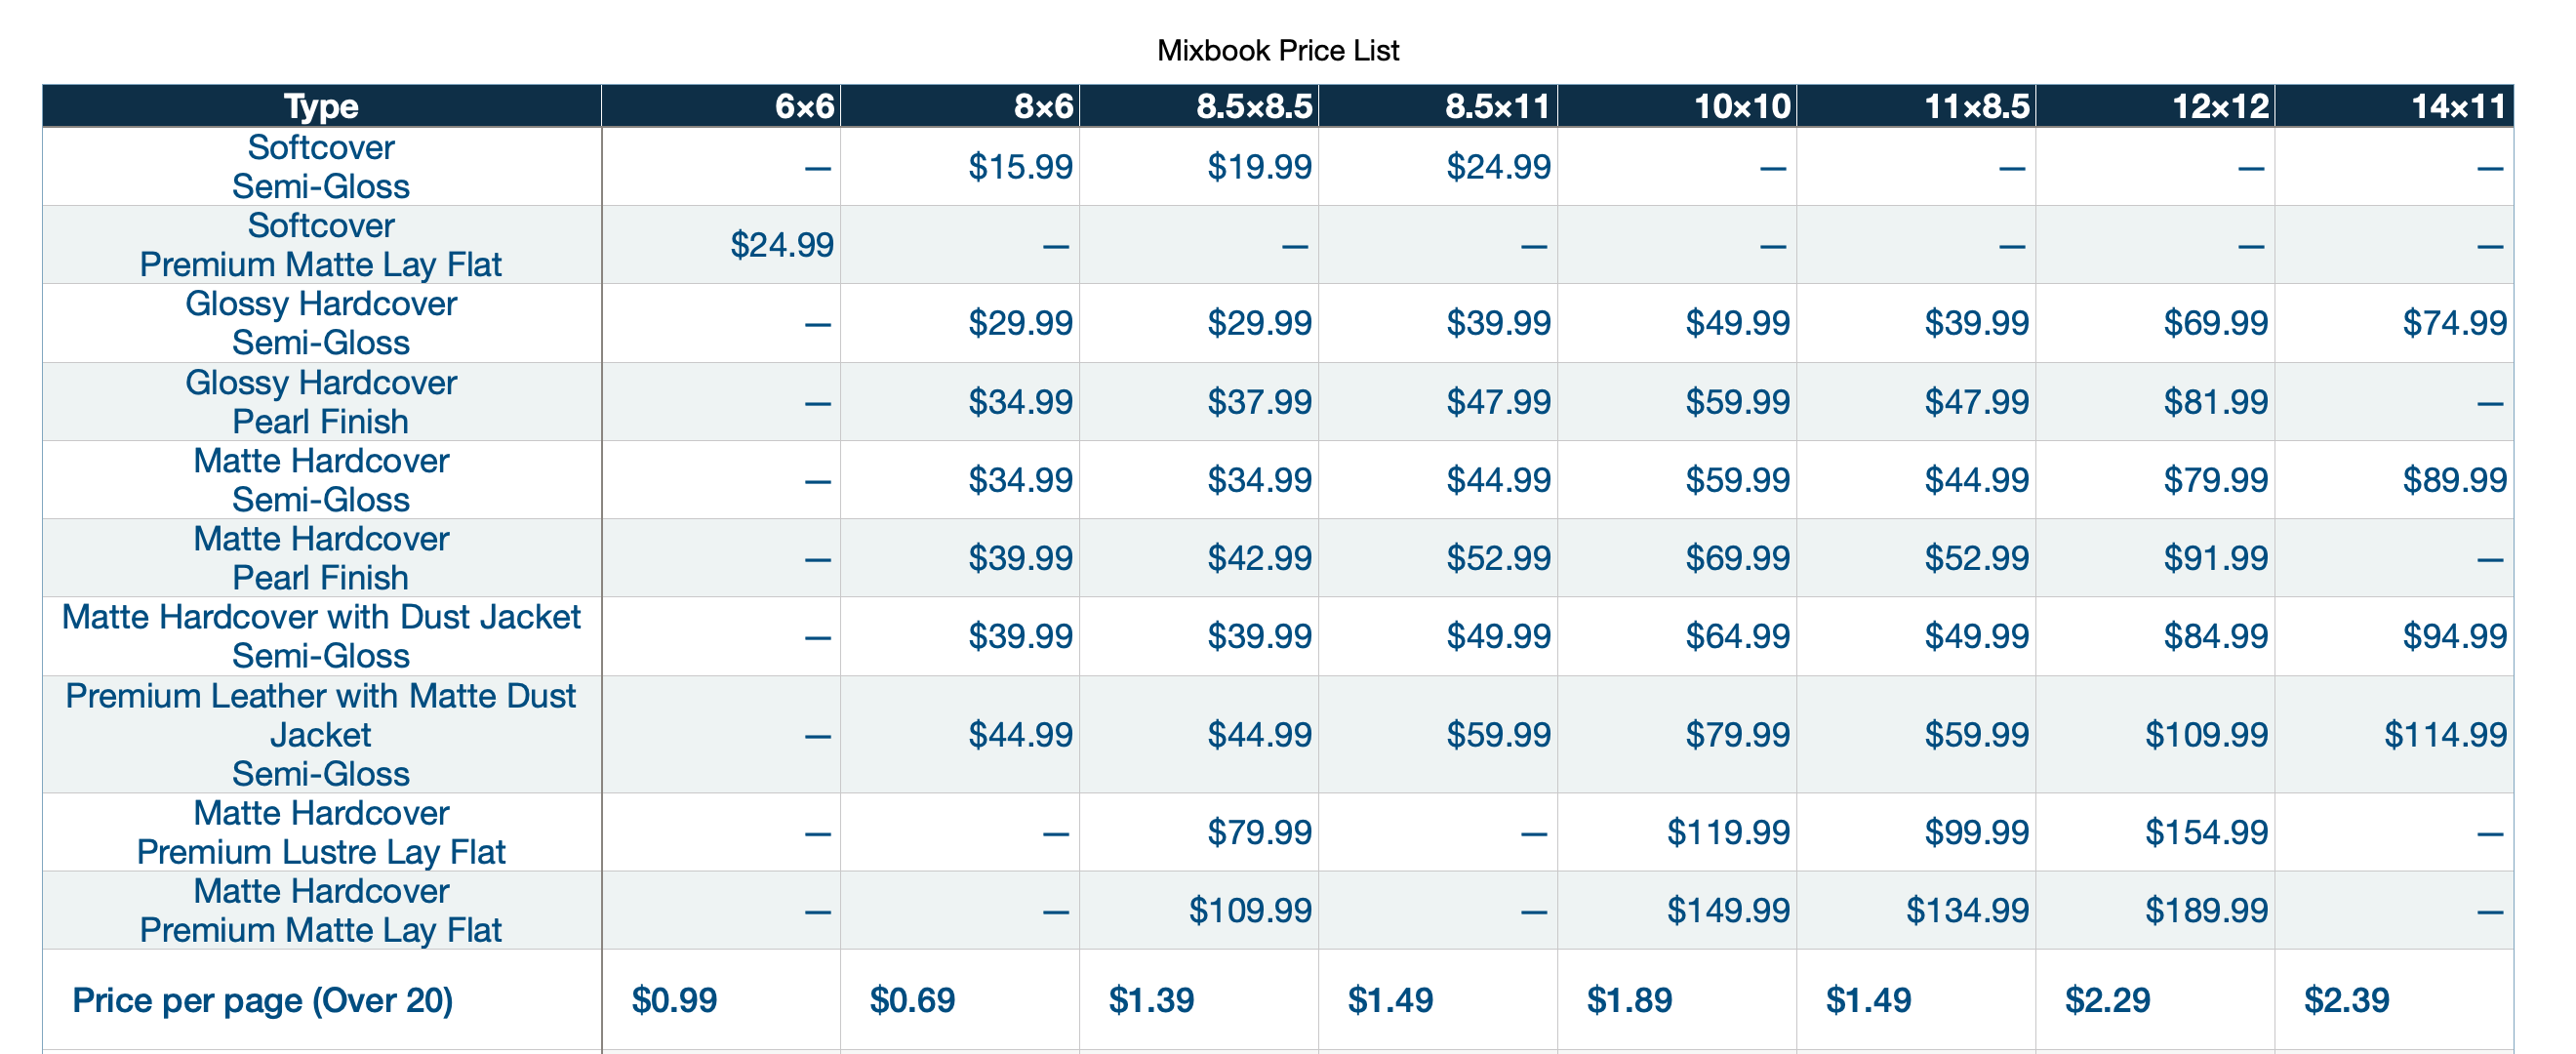
I think it depends on where you want to store it, who is likely to be using it and how many photo you have.

Mixbook price list – A full breakdown of book type and size
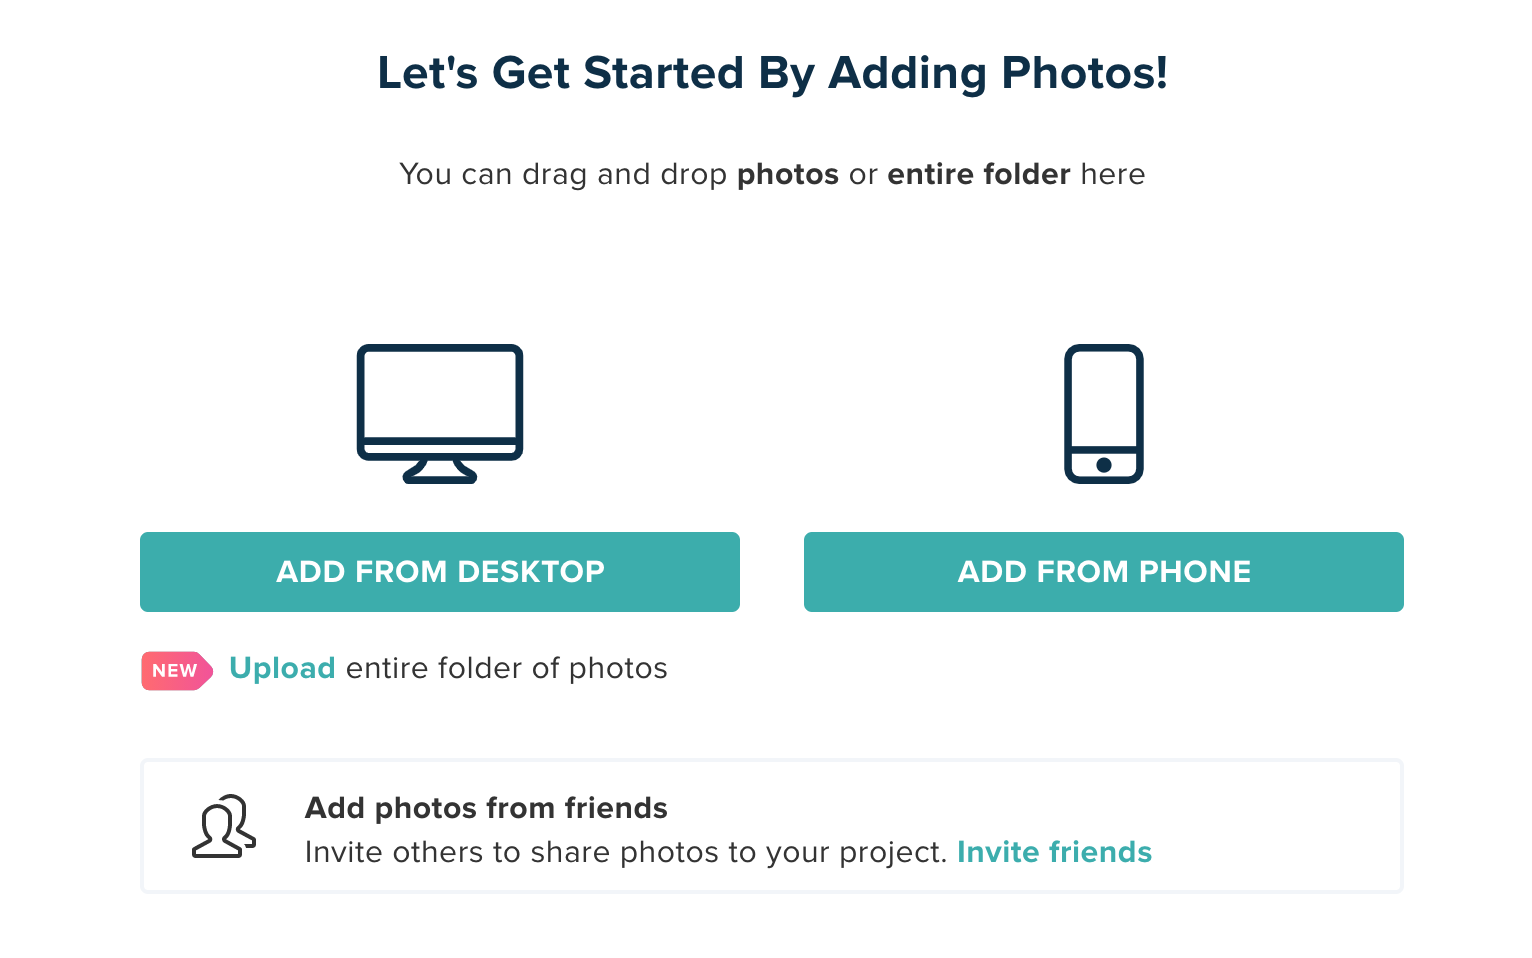
Step 2 – Gather & Upload your photos
Before you jump into the creation process I find it much easier if I know what I want to include in my photo book. For this particular book it’s about Jacks year so you could choose to do it by months, by events, by themes like cooking, reading, or whatever else you little one loves. (Remember you only need a few photos for each of these)So now you’ve chosen your photos you need to upload them to Mixbook and there are numerous ways to do this, but the main three are via desktop, via phone or get family and friends to upload so you can have a choose.
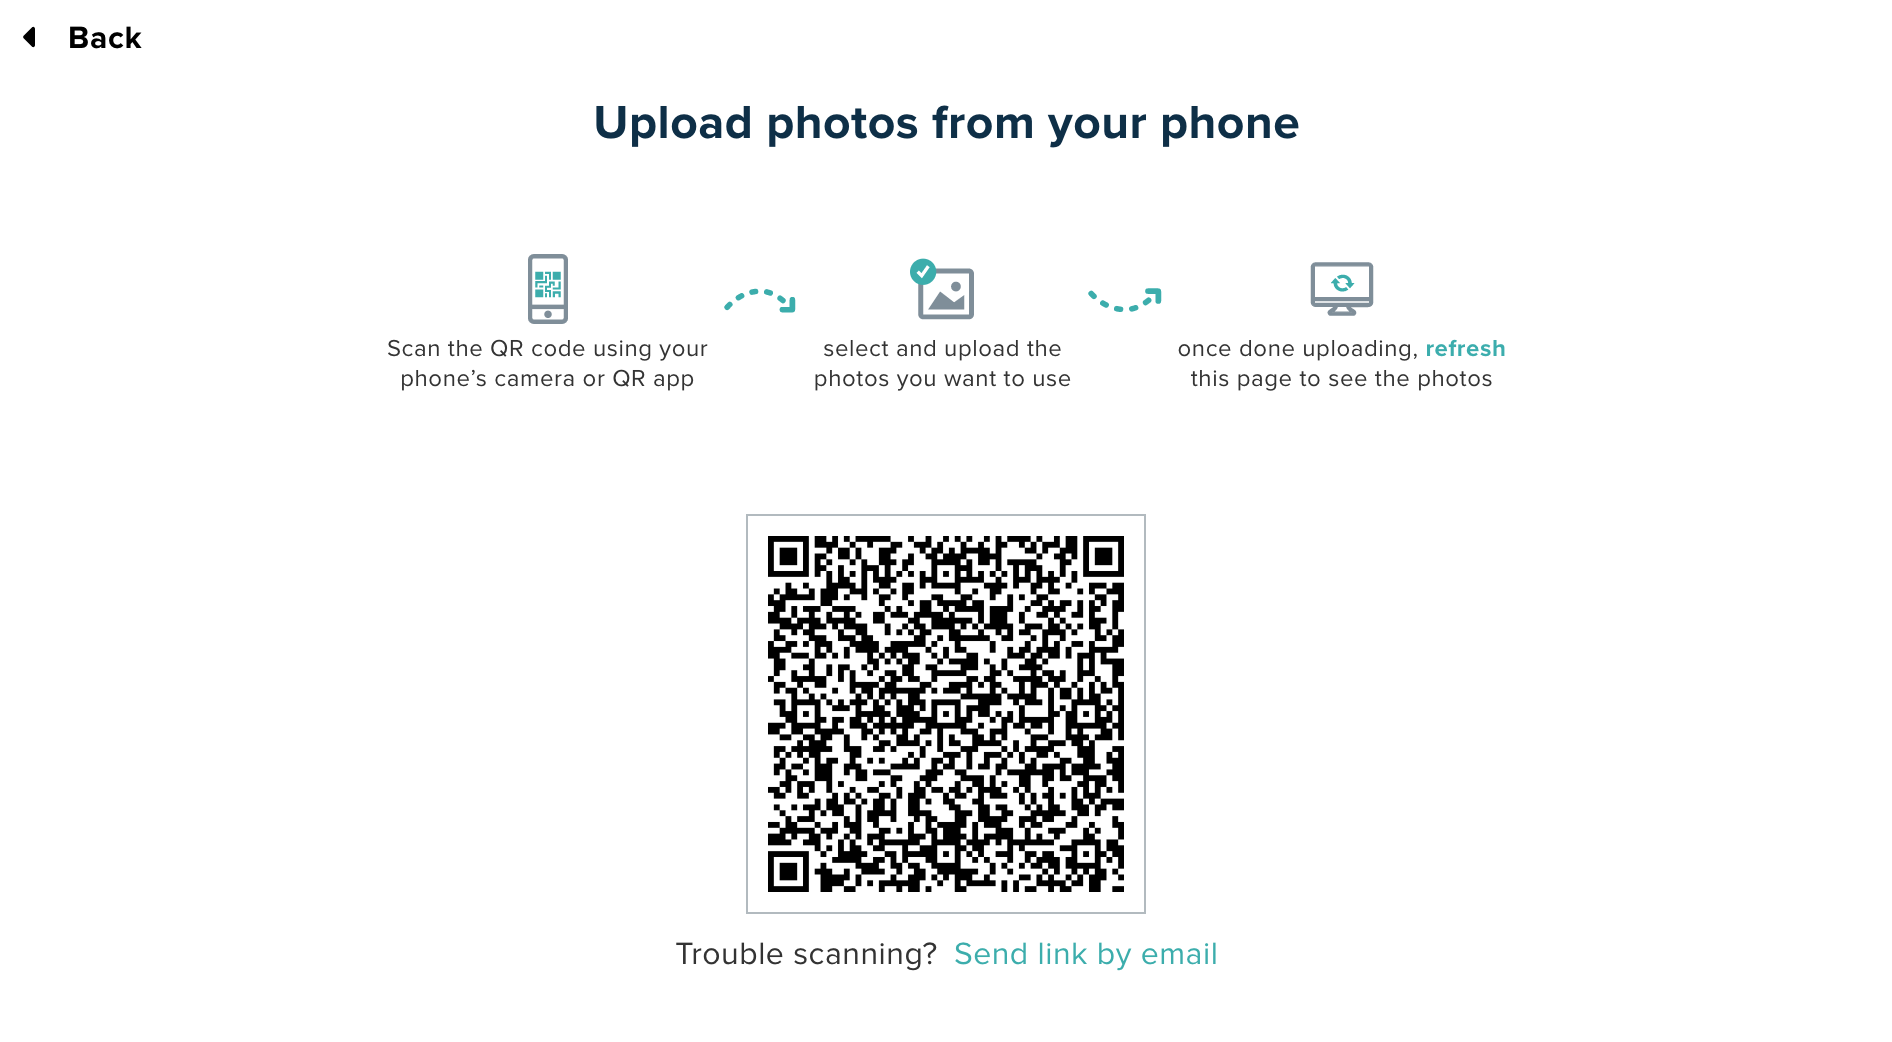
How do i import photos from iphoto to Mixbook?
- Open up mixbook.com from your phone and log in or use the QR code from desktop.
- Once in, click on my photos from the main menu.
- Upload the photos straight from your photo library.

How to pull up icloud photos in Mixbook
You’d use the same method as above to access your icloud photos from either your phone or mac. You can also import your photos from Facebook, Instagram, Google Photos and Smugmug.

Step 3 – Choose a layout and backgrounds
Now it’s time to edit your photo book, but where is Mixbook editor?  The Mixbook editor can be found once you open a project. Once the editor is open you’ll need to choose either a theme layout or a layout based on the number of photos you want on that page. This is a lot easier once you know which photos you want to use and how you want to layout your pages.
You have two main options for this:
- Theme based pages
- Chronologically
or a combination of these two. Organising your photos like this helps you know how many photos you have to use. You can then either add more pages or use more photos per page.
Now all you need to do is drag and drop your photo where you want it.
How to swap photo in Mixbook on a page?
If you want to swap photos around you can do so by selecting the photo you want to swap, click swap

How to hide used photos on Mixbook?
Check the hide used photos on the photo panel.

Step 4 – Add stickers or text
Looking for where to find stickers for Mixbook or how to upload stickers to Mixbook.

Some of the stickers are script text and labels so it’s always worth looking in there first, before attempting to create your own version.
How to add text box in Mixbook?
To add or edit a text box in Mixbook:
- Click the Text tab and then the add text button.
- Drag the box to where you want the

Step 5 – Proof your Photobook
I always think it’s worth getting another set of eyes on your work. When you’ve been working on it for a while, it’s very easy to overlook a spelling error or typo.
How to share a preview

Then once you’re happy it’s time to order.
Delivery times to the UK are a little longer, but normally come before their expected date.
I’d love to hear what you think about Mixbook, and if you’d like to know more about the quality of the books, then check out my Mixbook reviews.


