
Creative Clothing Photography Ideas: How to take pictures of clothes to sell
Clothing photography is a skill that can be learned relatively easily. In this tutorial, we will show you how to photograph clothes effectively to increase sales, whether you’re working with dresses, jeans, shirts, sweatshirts, or baby clothes. You’ll learn different ways to photograph clothes, including how to take photos of clothing to sell online and how to photograph fabric close-up.
There are several factors to consider before taking your product photos, such as how to display the clothing, how to photograph black or white clothes correctly, and how to take close-up shots of fabric. Once your setup is ready, it’s time to start shooting! This tutorial includes numerous tips on how to achieve the best results with your clothing product photography.
Step One – Decide on how you want to display your clothes
There are different ways to photograph clothes, depending on the style and purpose of the images. Learning how to photograph dresses, jeans, shirts, and other clothing items requires selecting the best display method.

Model fashion photography: Photographing clothing on a model helps customers visualise how the clothes will look when worn. This type of photography gives the customer a good idea of how the clothing will look when worn, and a great way to learn how to take pictures of shirts and dresses.
Flat lay clothing photography: Laying clothing flat on a surface is great for capturing jeans, sweatshirts, and accessories in an artistic way. This is especially useful when figuring out how to take product photos of clothing with minimal props.
Ghost Mannequin: This technique showcases clothing on an invisible mannequin, giving it a 3D effect, making it ideal for e-commerce. It’s particularly helpful for photographing clothes to sell online.
Step Two – Prepare your Clothing Photography Equipment
Before you start taking pictures, you need to make sure you have all of the necessary equipment.
Best camera and lens for clothing photography
Any camera that allows manual settings is a good start. A lens with a focal length over 50mm prevents distortion and ensures sharp details. A RAW-compatible camera is recommended for better editing flexibility.

Pick a Background That Matches the Clothing Style
One of the most important things to consider when taking product photos is the background. The background should be something that matches the style of the clothing. For example, if you are taking pictures of a dress, the background should be feminine and pretty.


Use a Solid Colour Background for Clothing Photos
If you want to use a solid colour background, it’s best to choose a colour that complements the clothing. For example, if you are taking pictures of a white dress, use a light blue or pink background. This will help make the dress stand out against the background, but if in doubt a white background is a good go to, because it avoids any colour casting.
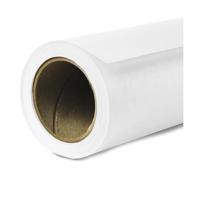
My Favourite White Backgrounds
A white backdrop can provide a clean and professional look. There are a variety of white background materials available, each with its own advantages. Paper backgrounds are inexpensive and easy to set up, but they’re not as durable as other options. Foam boards are more sturdy, but they can be expensive. Fabric drops are another popular choice, as they’re lightweight and easy to transport. Ultimately, the best white background for your project will depend on your budget and your specific needs.
If you don’t have a nice background, consider using Canva’s background removal tool and add it in after.
Details matter
So keep a lint rollers, pins and tape handy to enable you to show the clothing off in the best possible light.
Step Three – Prepare your Clothing Products
Before you start taking pictures, you need to make sure your clothing products are prepared correctly.
Iron your Clothing
If the clothing is wrinkled, it will be difficult to photograph and will not look very professional. Make sure to iron all of the clothes before taking pictures.
Hang Clothing Properly
Hanging the clothing incorrectly can cause wrinkles and creases in the fabric. Make sure to hang the clothing correctly so that it looks smooth and wrinkle-free in the photos.
Clothing Should be Clean and Fresh
Make sure all of the clothes are clean and free of any dirt or stains. Stained clothing will not look very appealing to potential buyers.
Experiment with different ways to fold or hang clothes
Step Four – Clothing Photography Lighting
The lighting is one of the most important aspects of clothing photography. If the lighting is not correct, the pictures will not be very good.


Natural Light: When taking pictures of clothing, it’s best to use natural light (just make sure you have enough light). Try to avoid using artificial light, such as studio lights, because they can cause harsh shadows and reflections on the clothing. However, if you need to use artificial light equipment consider using a fill light and check out these lighting setup essentials.
If you are taking pictures indoors, try to find a room with large windows so that you can take advantage of the natural light. If the weather is good, take the pictures outside in natural soft light.
Studio Lighting: If using artificial light, add a fill light to prevent harsh shadows. Softboxes help control reflections, especially when photographing reflective clothing.
Step Five – Check your Camera Settings for clothing
Before you start taking pictures, make sure to check your camera settings.
You’ll want to use a mode that will allow you to take pictures with a large aperture. This will help create a shallow depth of field and will make the clothing stand out against the background.
The aperture should be set to around f/11 or f/16. This will ensure that the entire Clothing is in focus.
The shutter speed should be set to around 1/250. This will help prevent any motion blur in the pictures, but can be lowered for accurate exposure if you use some stabilisation technique.
ISO
The ISO should be set to around 100 or 200. This will help prevent any noise in the pictures.
Step Six – Start Photographing Your Clothing Products
Capture multiple angles to showcase the clothing’s details. If you’re photographing fabric close-ups, use a macro lens to highlight textures and patterns. When photographing white or black clothes, adjust exposure and white balance settings carefully to prevent overexposure or loss of detail. Knowing how to photograph jeans to sell and how to take pictures of shirts from different perspectives can make a significant difference in sales.
For reflective clothing, consider using diffused lighting to minimize glare.


Step Seven – Editing your Clothing Product Photos
You not done yet. After you have taken all of the pictures, it’s time to start editing them.
There are a number of different photo editing software programs that you can use to edit your photos. Some of the most popular programs include Photoshop, Lightroom and Luminar.
When editing your photos, try to make them look as professional as possible. This will help increase the chances of someone buying the product. Remember the following:
- Color Correction: Ensure colors match the actual product.
- Remove Backgrounds: If needed, use Photoshop or Canva.
- Sharpen Details: Enhance textures, especially when photographing fabric close-ups.
By following these steps, you’ll be able to photograph clothes in a way that attracts buyers. Whether you’re learning how to photograph baby clothes or how to photograph sweatshirts, experimenting with different techniques, angles, and lighting setups will help you refine your skills.
If you found this tutorial helpful, share it with your friends and fellow sellers!


